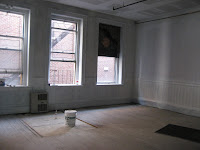
The fabulous lunch room with decidedly exposed wooden stud wall and shiny new floors...
(since I posted this the room got painted!!)


 With just a few extra screws and a simple can of Electric Orange Paint from the Home Depot we were able to transform this ratty old farm table into a daydream!! This will take up a post in the common area lunch room and hopefully be the locale for many a deep and meaningful conversation about art or whatever. In the background of the last picture is the table pre-orangification. More pix to come once its in position (when the legs dry of course)
transom n 1: a window above a door and hinged to a transom [syn: transom window, fanlight] 2: a horizontal crosspiece across a window or separating a door from a window over it [syn: traverse]


 After all of the tedious work done on the salvaged windows from Wilbur's Antique Barn in Greene... We finally have our homemade transom windows. We ordered remakes of the old style latches from a place in Portland OR that work by simply slipping a hook through the loop and pulling down on it. Then there are nice little chains to catch the window and keep it from falling too far open. Seeing that we are going the anti AC route due to expense and our disbelief in it, we thought that there would be a natural cross breeze when these are all open. That and the ceiling fans should make it just right in the summer. You also get a glimpse in these pictures of the fabulous string art light fixture we scored at a yard sale in Houlton Maine this summer.

 Barry and I decided that we needed to spice up the tiny bathroom space in the common area with some stripes. So manned with a dozen or so cans of misfit paint from the Restore we went nuts. Cutting 3 to 10 inch srips of plywood and then painting them with the unplanned colors (because randomnes is always best) The planks were then clear coated and screwed to the old subfloor with nice even rows of screws across the expanse. Once again I say... GO RESTORE!!


 The Restore was good enough to sell this lovely light fixture to us for a whopping 50 cents. Now it will have a new home in the hall as you come up the stairs.


 On one particular day I was exhausted by my third trip to the Depot.... but it was all worth it.


 Studio C taking shape!! I'm focussed on this particular studio because its slated to be mine. Can't wait to set up shop! Also, you can see a before shot of this wall in the post prior to this one, showing the pink paint and what were window-like openings into the kitchen. The new openings will be for the windows into the common space I mentioned previously.